Transforming Scraps into Culinary Gold: The Magic of a Leftovers Traybake
In a world increasingly conscious of sustainability and mindful consumption, the humble act of repurposing food has never been more relevant. Enter the "leftovers traybake" – a culinary hero that transforms disparate ingredients lingering in your fridge into a cohesive, delicious, and often surprisingly gourmet meal. More than just a way to clear out the refrigerator, a leftovers traybake is an ode to creativity, convenience, and conscientious cooking, offering a delightful solution to weeknight dinner dilemmas and a powerful weapon against food waste. Imagine the scenario: a few roasted potatoes from Sunday lunch, a handful of cooked chicken from Tuesday’s stir-fry, some wilting broccoli, and perhaps a dollop of sauce. Instead of eyeing them with suspicion or resigning them to the bin, a traybake invites you to see their potential. It's a method that celebrates improvisation, requiring minimal fuss but delivering maximum flavour and satisfaction. This guide will walk you through the art of crafting the perfect leftovers traybake, turning forgotten fragments into a fresh, exciting feast.The Art of the Leftovers Traybake: More Than Just Waste Reduction
At its core, a leftovers traybake is about efficiency. It's about taking ingredients that have already been cooked and simply reheating and combining them in new and exciting ways, often with the addition of a few fresh elements or a unifying sauce. This method is a game-changer for several reasons:- Minimises Food Waste: This is arguably the biggest driver. Globally, immense amounts of edible food go to waste. A traybake actively combats this, giving a second life to ingredients that might otherwise be discarded, saving money and reducing environmental impact.
- Unbeatable Convenience: Most of the heavy lifting (cooking the components) has already been done. Assembly is quick, and cleanup is often just a single tray. Perfect for busy weeknights!
- Budget-Friendly: By utilising what you already have, you reduce the need to buy additional ingredients, keeping your grocery bills down.
- Endless Versatility: There are no strict rules. From Mediterranean-inspired medleys to Asian-fusion creations, your imagination is the only limit. This flexibility allows for incredible flavour exploration, as we discuss further in leftovers traybake - Article 2, where we dive into specific ingredient combinations.
- Creative Outlet: It encourages you to think outside the box, experimenting with flavour profiles and textures you might not typically combine.
Building Your Masterpiece: What Goes into a Leftovers Traybake?
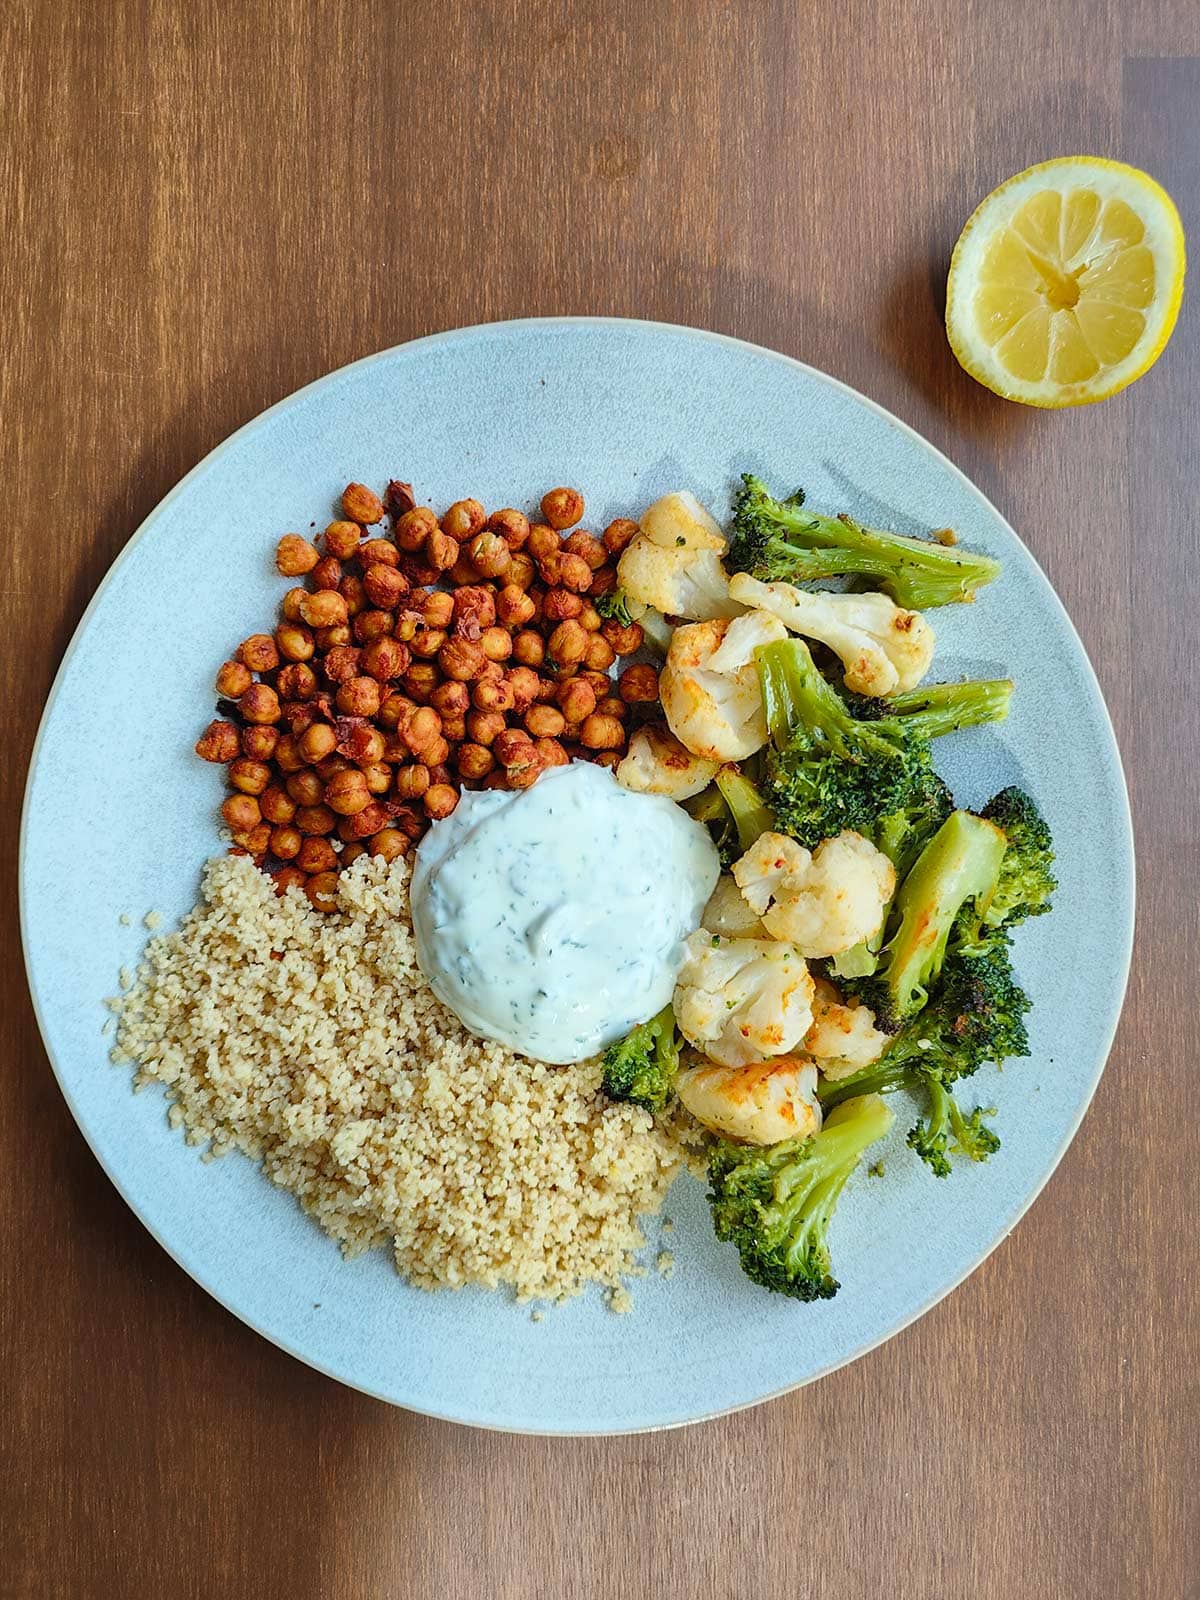
The beauty of a leftovers traybake lies in its adaptability. Almost anything can find a place on the tray, provided it's safe to reheat and compatible with its neighbours. Think of your traybake as a canvas, and your leftovers as your palette. Here’s a breakdown of common categories and how to integrate them:Proteins
These often form the hearty core of your traybake.
- Cooked Meats: Shredded roast chicken, leftover pork loin, sliced beef, crumbled cooked sausages or bacon, lamb from a Sunday roast. Ensure they are fully cooked from their initial preparation.
- Fish: Flaked cooked salmon, cod, or other sturdy white fish can be gently incorporated. Be mindful that fish reheats quickly and can dry out, so add it later in the baking process or ensure plenty of sauce.
- Plant-Based: Cooked lentils, chickpeas, black beans, crumbled cooked firm tofu or tempeh, or even leftover veggie burgers can be excellent additions.
Cooked Vegetables
The backbone of any good traybake, adding colour, nutrients, and texture.
- Roasted Vegetables: Potatoes, sweet potatoes, carrots, parsnips, bell peppers, onions, zucchini, eggplant. These are ideal as they hold their shape and flavour well upon reheating.
- Steamed/Boiled Vegetables: Broccoli florets, cauliflower, green beans, peas, corn. These can be added directly or given a quick sauté for extra flavour.
- Leafy Greens: Spinach, kale, or chard can be wilted into the traybake towards the end or served fresh on top.
Grains & Starches
For substance and comfort.
- Cooked Rice: White, brown, or wild rice. Spread evenly, ensuring it doesn't dry out.
- Cooked Pasta: Short pasta shapes like penne, fusilli, or macaroni work best.
- Other Grains: Cooked quinoa, couscous, or bulgur wheat.
- Bread/Potatoes: Day-old bread can be cubed and tossed for croutons, or leftover mashed potatoes can be dolloped on top for a shepherd's pie effect.
Sauces & Flavour Boosters
These are crucial for unifying the ingredients and adding moisture and zest. This is where your traybake truly comes alive, a topic we delve into more deeply in leftovers traybake - Article 3, focusing on various sauce options.
- Tomato-Based: Marinara, passata, leftover Bolognese or chilli con carne sauce.
- Creamy: A splash of leftover gravy, béchamel, or even a swirl of cream cheese thinned with milk.
- Pesto: A vibrant addition for Mediterranean vibes.
- Dressings/Marinades: Balsamic glaze, tahini dressing, or a simple vinaigrette can elevate flavours.
- Cheese: Grated cheddar, mozzarella, Parmesan, or crumbled feta for a cheesy crust.
- Herbs & Spices: Fresh or dried herbs (parsley, oregano, thyme), paprika, cumin, garlic powder, onion powder – tailor to your desired flavour profile.
- Broth/Stock: A little splash can prevent drying out.
The Traybake Method: From Fridge to Feast
Once you've gathered your components, the assembly and baking process is straightforward, but a few tips can ensure success:- Preheat & Prepare: Preheat your oven to a moderate temperature, typically 180-200°C (350-400°F). Lightly grease your baking tray or line it with parchment paper for easy cleanup.
- Chop & Combine: Ensure all your leftovers are roughly uniform in size to promote even heating. Any very large pieces should be cut down. Toss all your chosen ingredients (proteins, vegetables, grains) together in a large bowl.
- Add Your Unifier: Drizzle over your chosen sauce, stock, or dressing. Season generously with salt, pepper, and any herbs or spices. Mix well to ensure everything is coated. This step is crucial for flavour distribution and moisture.
- Arrange on Tray: Spread the mixture evenly in a single layer on your baking tray. Don't overcrowd the tray; if you have too much, use two trays. Overcrowding can steam the food instead of roasting it, leading to a less appealing texture.
- Bake Until Hot & Crispy: Bake for 15-25 minutes, or until all ingredients are piping hot throughout and any sauces are bubbling. If you want a crispy top, you can finish it under the grill (broiler) for a few minutes. If adding cheese, sprinkle it on for the last 5-10 minutes of baking.
- Final Touches: Once out of the oven, consider adding fresh elements like a sprinkle of chopped fresh herbs (parsley, chives), a squeeze of lemon juice, a dollop of yogurt or sour cream, or some toasted nuts for extra crunch.
